The Breathing Lung Exhibit
Turn a class lecture into a powerful tool to teach and inspire—and inspire yourself in the process.
In a crowded theater lobby, a 10-year-old tugs at his mom’s arm and points to me, saying, “Hey, mom, that’s the man with the lungs.” Like a celebrity who has been “spotted,” I smile back and say “howdy.” For many children, the day a respiratory therapist spends an hour with their class demonstrating the Breathing Lung Exhibit (BLE) is one of the most memorable days of their school year. Public and private schools universally welcome respiratory therapists who offer to teach students about their lungs. One third-grade boy says, “I learned there are thousands of chemicals in cigarettes like tar and stuff that is in car batteries. You get diseases in your lungs and they turn black. I would not want to have tar on my lungs. Now, when I grow up, I will not smoke.”
 John Wolfe, RRT, with high school students and the Breathing Lung Exhibit.
In addition to providing a much more in-depth understanding of lung function than their health and science classes can offer, the BLE is also an effective smoking prevention and cessation tool. “The BLE has always been a great tool for helping to prevent the initiation of tobacco use among young people, and it is now being used to help people quit smoking as well,” says Sarah Davis, Tobacco Program Manager for the American Lung Association of Colorado. “Several high schools across the state have begun using the BLE as a tool to recruit students to join their Not-On-Tobacco (N-O-T) smoking cessation program.”
N-O-T facilitators have set up the BLE in classrooms, hallways, and even the cafeteria as a way to get teens to think about quitting smoking. “It’s incredibly eye-catching—the kids can’t help but stop by,” says Heidi Briscoe, a N-O-T facilitator at Denver’s West High School. When the teens come by the table to look at the black lungs, the N-O-T facilitators make sure to let them know about the upcoming smoking cessation classes. “The lungs are a catalyst that get the kids talking about smoking—their own smoking or a friend’s or family member’s.” The teens are not the only ones drawn in by the lungs—teachers and staff members are also intrigued. “It was great for the school as a whole,” Briscoe says.
The Breathing Lung Exhibit consists of two pairs of swine lungs—one pink and healthy, the other treated with carbon slurry, looking exactly like a smoker’s lung. They are preserved and stored in plastic resealable containers and are completely odorless. Because swine lungs are virtually identical to human lungs, they make excellent teaching tools. And just as a picture tells a thousand words, a pair of lungs speaks volumes. Michele Chesham, at Denver’s Challenge School, says, “It makes such a difference when students can see the ill effects of tobacco use.”
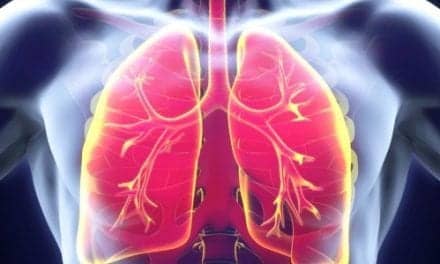
A Breathing Lung Exhibit gives students the opportunity to learn about lung anatomy and physiology, basic gas laws, semipermeable membranes, and pressure gradients. And it gives them a profound understanding of the fact that there is a delicate organ at the other end of every cigarette that is smoked.
Demonstrating the Breathing Lung Exhibit offers respiratory therapists an important opportunity to take what we do out of the clinical setting and into the community. It raises awareness and respect for our profession, and it gives us a chance to make a difference in a way that is profoundly different than providing patient care.
Do It Yourself
The knowledge base of a respiratory therapist about basic lung function is so extensive that there may be a tendency to show up at a classroom, pull out the lungs, and begin talking. But it is better to have a lesson plan with specific goals and an outline of talking points. Save the actual lung demonstration for about the halfway point of a 1-hour demonstration.
Begin by introducing yourself, and not by simply stating your name and occupation. Take the opportunity to say a few words about what a respiratory therapist is, and talk about the wide variety of things we do, including the emergency department, neonatal and pediatric intensive care, home care, pulmonary function testing, and flight transports. If you are speaking to a class of high school students, ask if any of them have considered pursuing a career in health care, and give them good reasons for thinking about it. Refer them to the Web site for AARC (www.aarc.org). They can click on “Careers” to find a wealth of information about career opportunities as a respiratory therapist, and watch a 5-minute streaming video called “Life and Breath.” Be prepared to answer questions if they want to contact the nearest respiratory therapy school.
 Cindy Coopersmith, RRT, uses the exhibit to teach children about the effects of smoking on lungs.
Many students will have heard the words anatomy and physiology, but most of them will not be able to tell you what they mean. A bicycle is a useful analogy to help students understand the meaning of the words. Invite them to begin naming parts of the “anatomy” of the bicycle. As they name parts, begin drawing them on the board—frame, wheels, pedals, chain, etc. This gets them engaged in a learning activity and lets them know that this is not going to be a boring, passive lecture, but a fun, interactive event. Next, have them tell you what happens to the chain and the rear wheel when pressure is applied to the pedal. Now they understand physiology, and how anatomy supports physiology so the bike can do its job. This presents a perfect segue into lung anatomy and physiology.
Lung anatomy and physiology can be a simple review of “the respiratory system: 101.” Again, a simple board drawing can help the respiratory system take shape. Don’t be afraid to use the correct medical or scientific terms. As long as you clearly explain what they mean as you go, students are perfectly capable of keeping up with the conversation.
“What’s air made of?” You might be surprised at the answers you get to this question. Once you have established that air is primarily nitrogen and oxygen, you can ask them to guess the percentage of each. Consistently ask them to tell you the answers as you proceed, and avoid the tendency to lecture. You will find it is more engaging and fun for everyone.
Once you have established that air is a gas, and that oxygen is the gas our cells need for metabolism, you can use Gore-Tex as an analogy for the pulmonary capillary membrane, and talk about pressure gradients. Talk about the circulatory system—most students will understand that the heart pumps blood through the body, but many will not understand that it is simultaneously pumping blood through the lungs. A crude drawing of the circulatory system can be helpful in communicating that concept.
The Breathing Lung Exhibit
Now that you have the class excited about how their lungs work, you can present the actual lungs. The lungs are suspended from a framework of PVC plumbing pipes that are easily connected to a bellows-type raft pump that inflates the lungs. Be prepared for squeals as you invite a student to assist you in attaching the lungs to the framework and inflate the lungs for the first time.
Try not to let them see the “smokers” lung ahead of time—there is a certain shock factor when they see it for the first time, and you want to use that to full advantage.
Invite participation by having one volunteer install the lungs into the pipe frame and another to operate the bellows. Before attaching the bellows to the pipes, talk about positive pressure. After inflating the “healthy” lung, have them install the “smokers” lung and discuss the effects of smoking on the heart and lungs. Many students will associate smoking with lung cancer, but they may not know what cancer is, and they almost certainly will not be aware of the effects of carbon monoxide and nicotine on heart function or fetal development. Be prepared for lots of questions, and consider bringing handouts with information about the health effects of smoking. Your local chapter of the American Lung Association or the American Cancer Society will have ample materials available for you to use.
Getting involved in the community and volunteering outside the hospital or home care setting are rewarding experiences and can be an important “recharge” for RTs who become weary of treating the outcomes of lung disease. And the BLE is a dynamic tool for RT departments or state AARC chapters to utilize as a community service project. It profoundly increases our presence in the community, and may even inspire a student to decide, “When I grow up, I want to be a respiratory therapist!”
| Resources Breathing Lung Exhibits are commonly available from your local chapter of the American Lung Association (www.lungusa.org), American Cancer Society (www.cancer.org), or County Health Department. To contact your local ALA, dial (800) LUNGUSA to be connected with the chapter nearest you. Supplemental brochures, fact sheets, and handouts are also available from these sources and from the Campaign for Tobacco-Free Kids (www.tobaccofreekids.org). If BioQuest Inflatable Lung Kits are not already available in your community, they are inexpensive and available from several sources, including NASCO Teaching Aids, (800) 558-9595, and Community Intervention Inc, (800) 328-0417. Obtaining grant money to purchase a BLE is generally not difficult because the benefits are so self-evident. An excellent supplemental online teaching resource is available from the Science Museum of Minnesota (www.smm.org/heart/lungs/top.html). |
John Wolfe, RRT, is a frequent contributor to RT and a member of the magazine’s editorial advisory board.